How to configure the WordPress Integration with Members One
Integrating Members One with your WordPress site simplifies data transfer and directly connects our subscription tools to your store. This integration allows you to utilise the complete range of features offered by Members One. Follow the steps below to install and configure your integration smoothly.
First, download the latest version of the WordPress plugin. Then, go to:
Vendor Panel > Integrations > Connections > Ecommerce > WooCommerce, and click “Download Latest Plugin.”
Locate the file named membersone-integration.zip in your downloads folder. You are now ready to install the plugin into your WordPress store.
If you need assistance with the installation process, please click here for guidance. Otherwise, you may proceed directly to configuring the plugin.
Getting Started
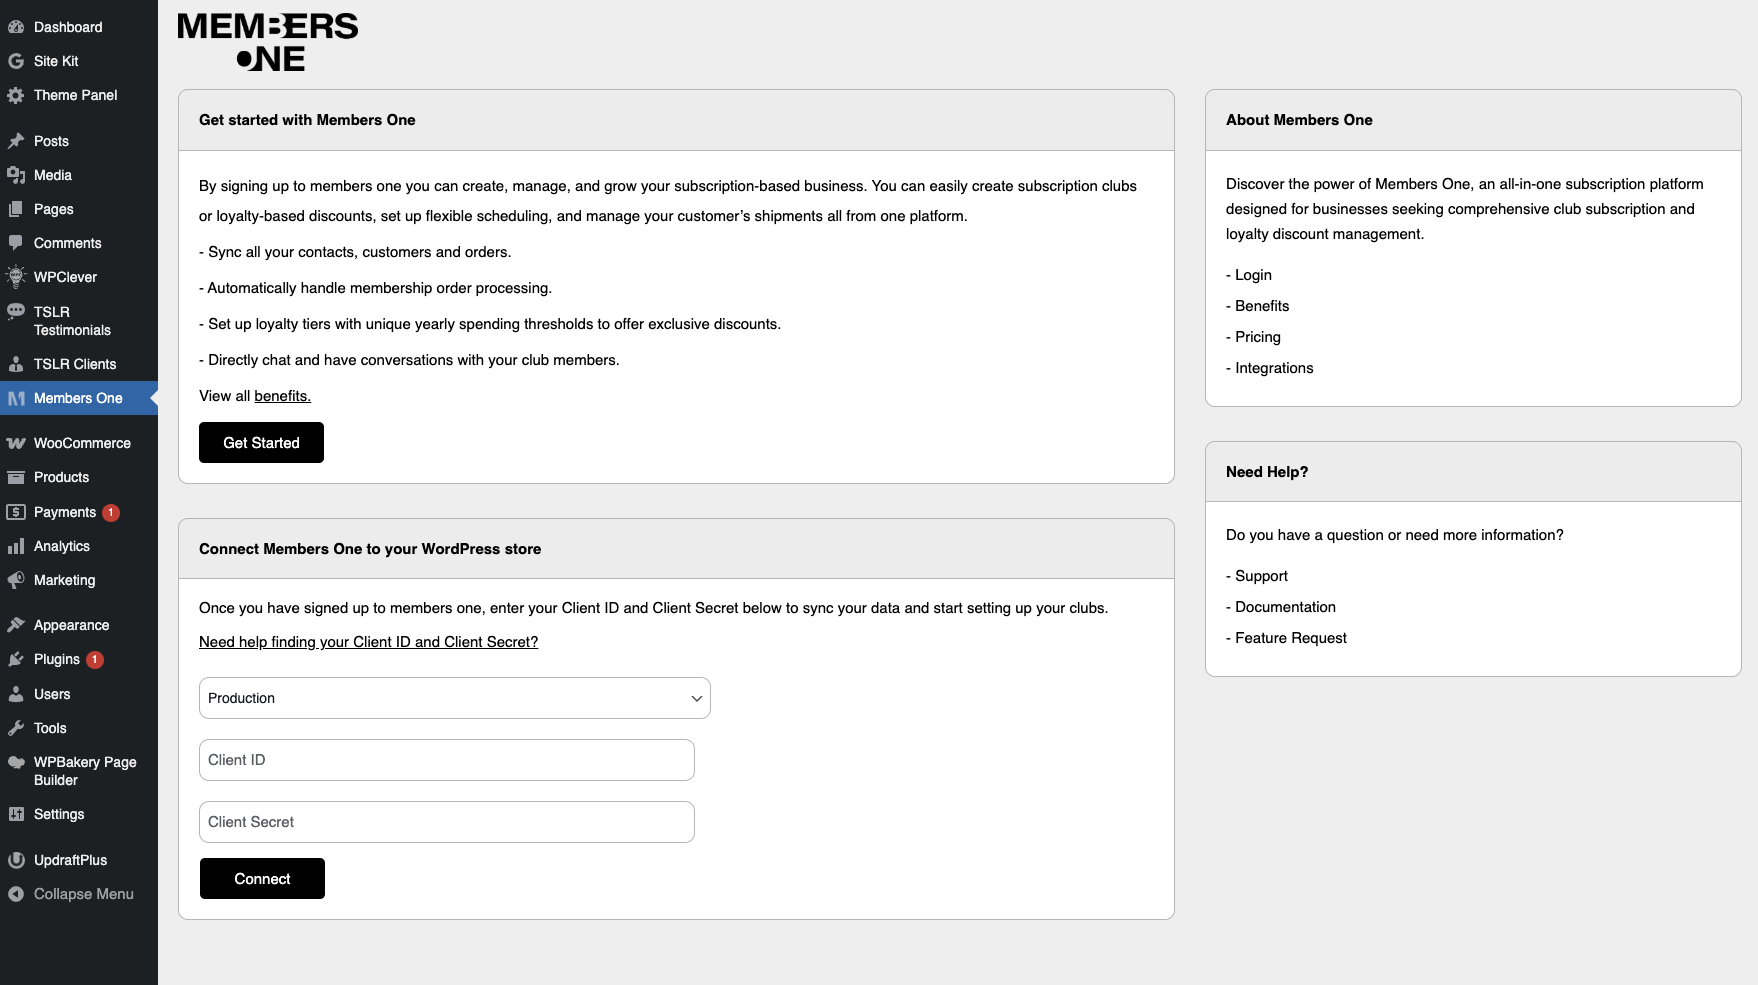
After installing the Members One Widget on your WordPress site, you’ll be directed to the configuration page. This is where you can set up your Members One integration.

If You’re New to Members One
-
Get Started: If you don’t have a Members One account yet, click here to explore our plans and pricing.
-
Client Credentials: Upon joining Members One, you’ll receive a Client ID and Client Secret. These can be found in your vendor panel under Integrations > Connections > eCommerce > WooCommerce.
Connect Members One to Your WordPress Store
-
Enter Credentials: In the configuration page, input your Client ID and Client Secret into the respective fields to link your eCommerce platform with Members One.
If you need help finding your eCommerce credentials, click here.
Configure Your WordPress Integration
-
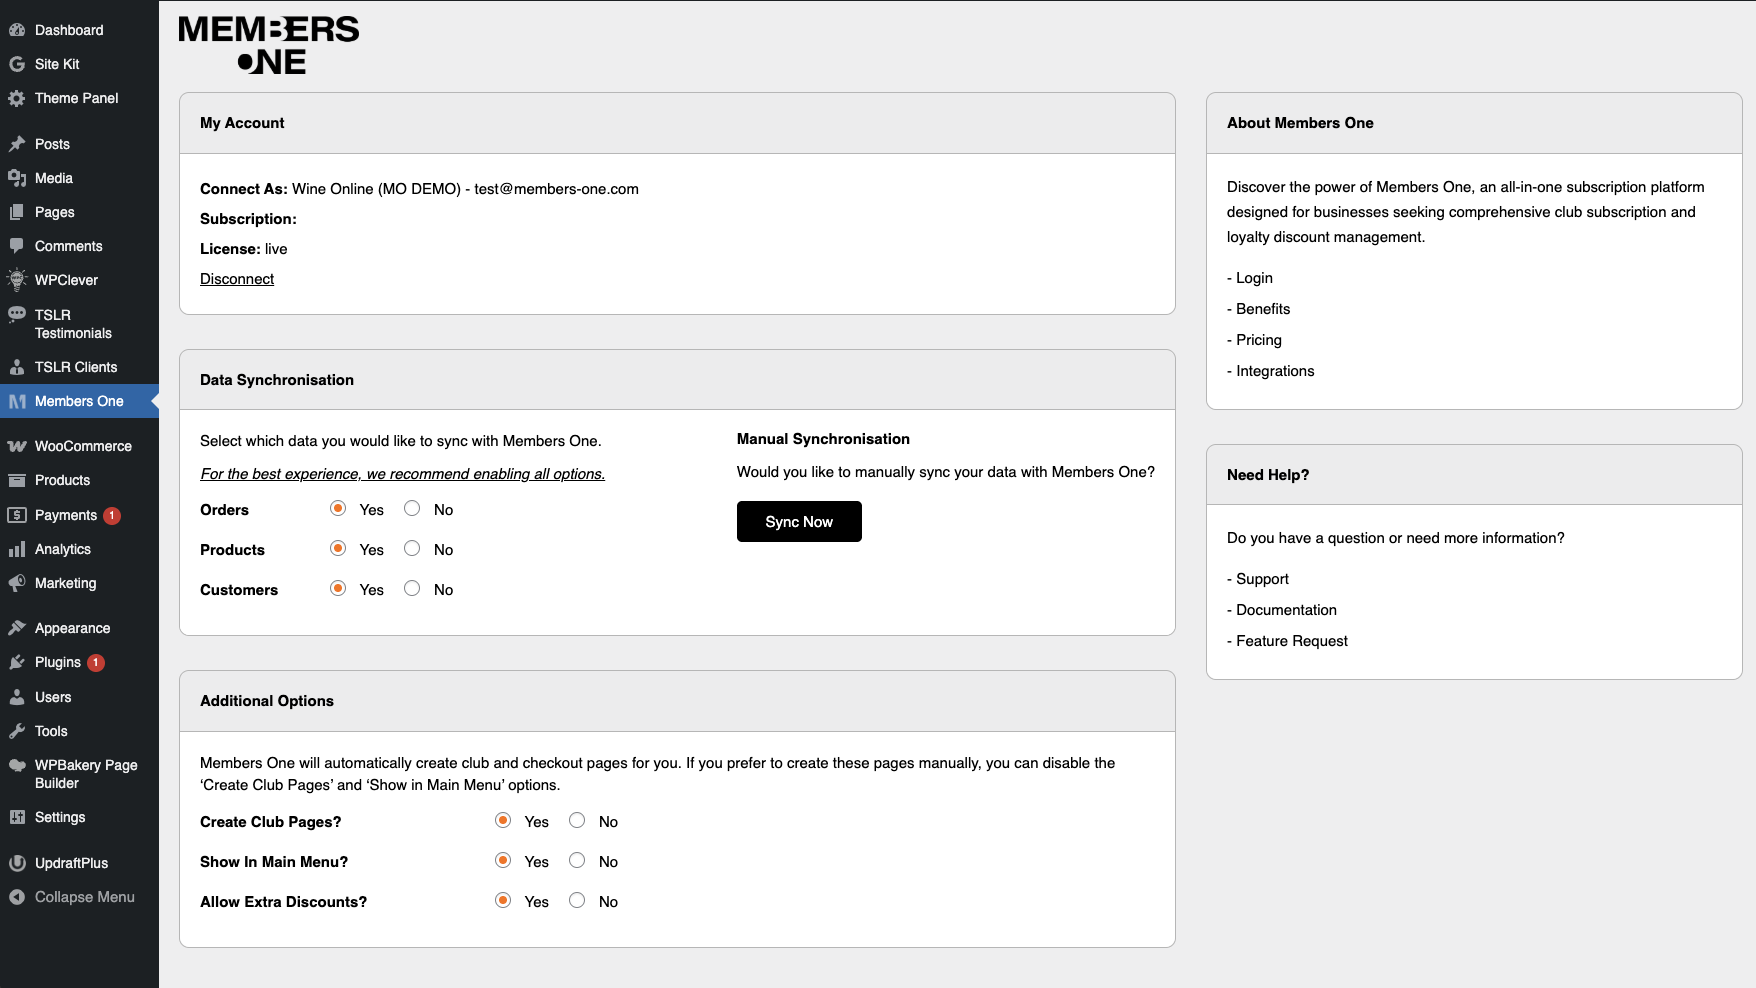
Account Connection: Once your account is connected, your details will appear under the “My Account” section, enabling you to configure settings for your Members One integration.

Data Synchronisation
-
Choose the data you wish to sync with Members One. For optimal functionality, it’s strongly recommended to enable all synchronisation options.
Automatic Data Sync
-
Members One keeps your data up-to-date by automatically syncing at set intervals or instantly when necessary.
Manual Synchronization
-
Should you need to manually update your data, click on “Sync Now” for an immediate refresh.
The best way to verify if data has synced successfully is by checking the integration tab in your vendor panel for the “Last Synced” time.
Additional Options
Creating Club Pages
- When selected, the Members One Widget automatically generates the necessary club pages. This will create the following URLS.
-
- Club Signup Page:
yourdomain.com/clubs - Club Checkout Page:
yourdomain.com/club-checkout
- Club Signup Page:
- If you need to regenerate the club pages in WordPress, please follow these steps.
-
Delete the existing pages from your eCommerce platform and ensure they are removed from the trash.
-
Uninstall the Members One Plugin from your WordPress store.
-
Reinstall the Members One Plugin.
-
On the plugin configuration page, select the “Create Club Pages” option and set it to ‘Yes.’
-
For more information on designing these pages, click here.
Main Menu Display
-
Show in Main Menu? This option is disabled by default. Enable it if you want the membership page link to appear in your site’s main menu. Alternatively, you can manually create menu links or adjust the page titles within WordPress.
Final Steps
Congratulations! You have successfully configured the Members One integration with your WordPress store. Your store data is now synced with Members One, ready for you to set up and manage your subscription clubs.
Read More about optimising your subscription clubs with Members One.


